Using WinSCP3:
Select WinSCP3 from on the BCC computers or download it for use at home. When you start WinSCP3, you will see the following screen:
![]()
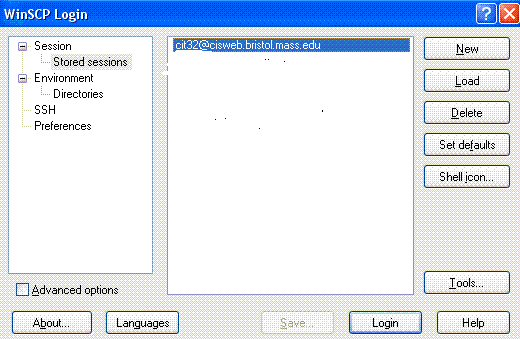
Note that I have one saved session, which I am not going to use in this example. I will click on new to start a new session. If you are working at home in a secure environment, it is fine to save a session. At BCC, you should not do it.

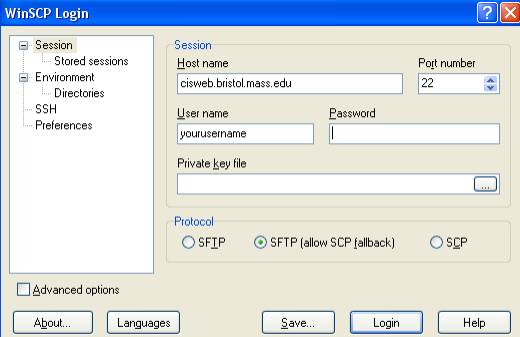
Now click on Login. Do not click on Save unless you want to save this information.
Note that I did not fill in password so I will be prompted for the password. When I am working at home, I would go ahead and enter the password because I consider home a secure environment.
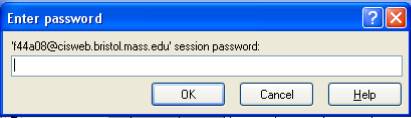
Now you enter your password and click OK to login.
This is what you should see.
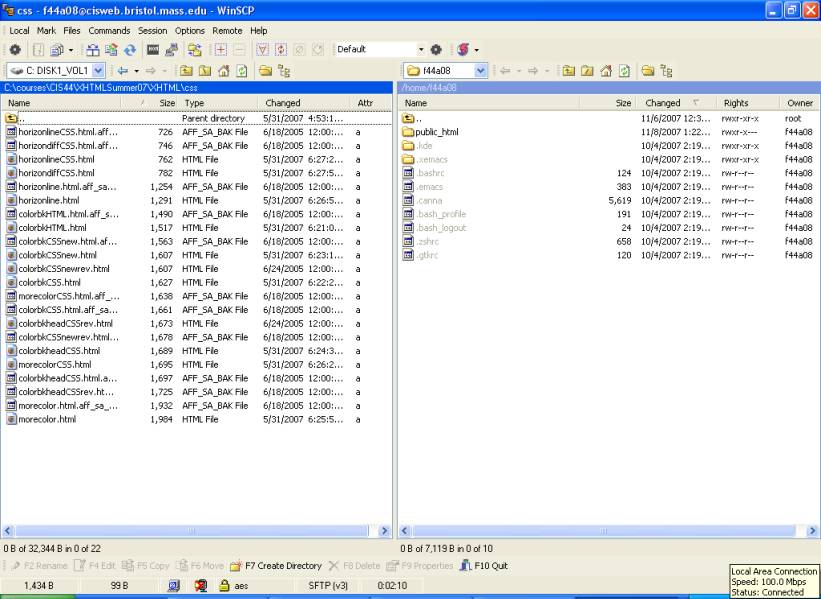
Note that you need to find the code you want to upload in the left listing – that is the listing of your computer. You will then take it over to the right side, which shows what is at the web site. The things you load should be loaded into public_html. Note the commands at the bottom of the screen which let you create a directory, copy etc.
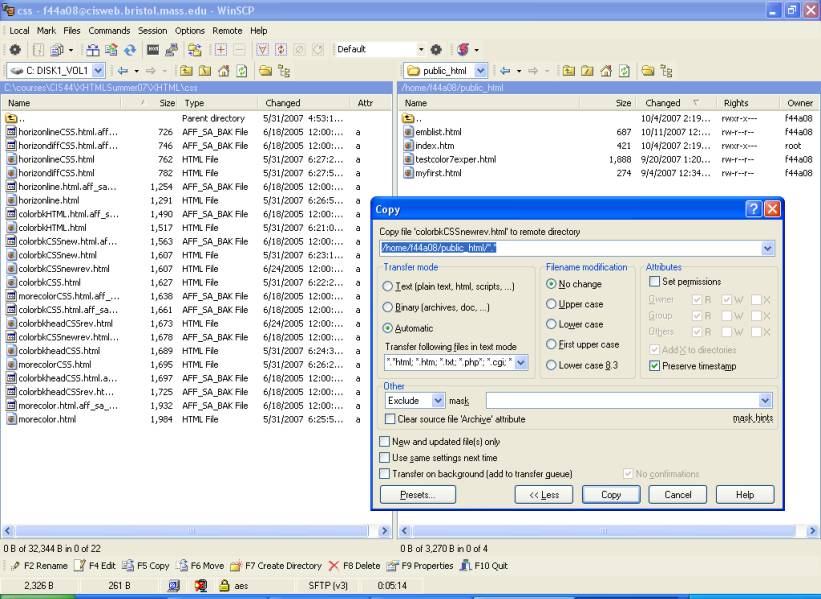
When I want to copy, I can either click on the command to copy or drag and drop. This is the screen I will see.
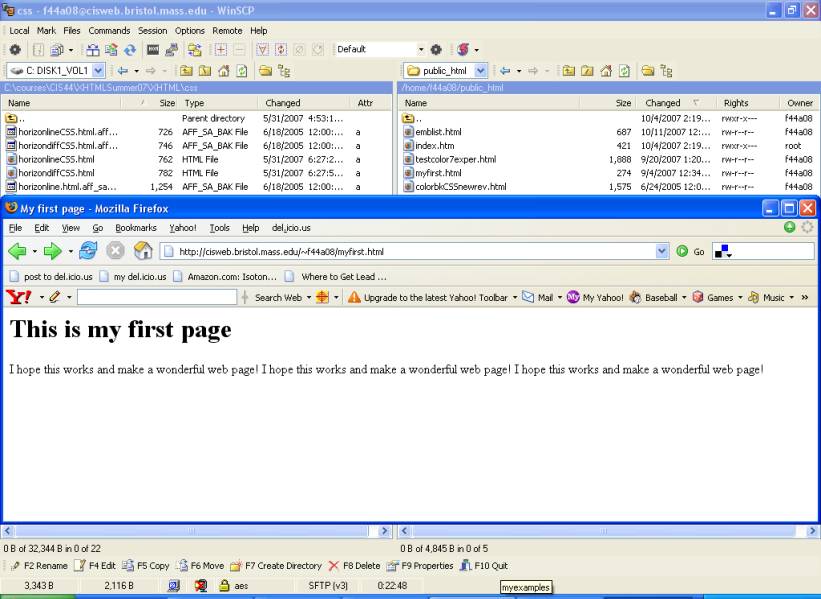
Now I want to see one of the pages that I have loaded into the public_html folder.
To do that I bring up a browser and key the address into the browser.
The address is cisweb.bristol.mass.edu/~yourusername/nameofcodeyouwantosee.html or .htm. In this example, the address is
http://cisweb.bristol.mass.edu/~f44a08/myfirst.html
Please note the tilde right after cisweb.bristol.mass.edu/. The tilde operator is used to to specify the home directory associated with the user name, so also, please note that you do not refer to the public_html folder by name even though you have stored you page in that folder.
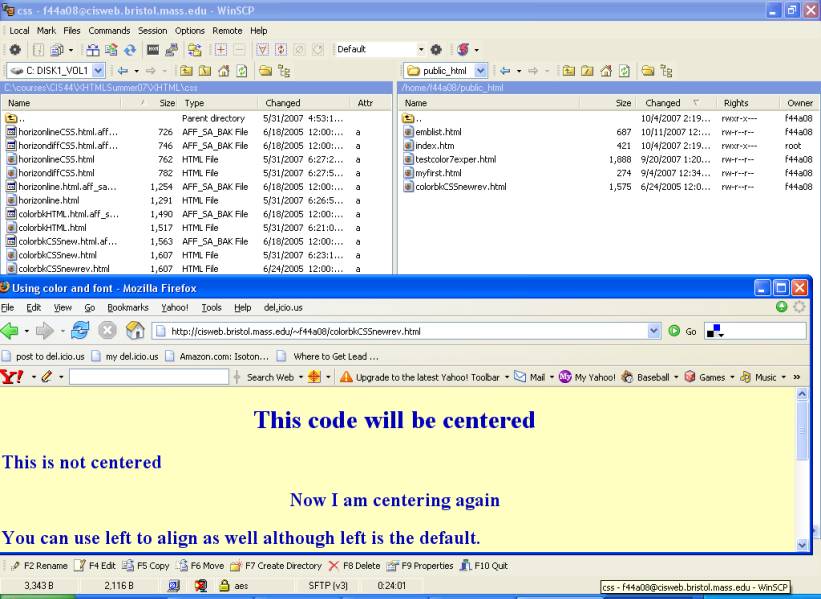
Here is myfirst.html in a browser window. Below that is the page I uploaded. The address for that is: http://cisweb.bristol.mass.edu/~f44a08/colorbkCSSnewrev.html