Oracle9i Database Release 2 Personal Edition Installation
Instructions for the Windows Operating System
The files needed to perform the installation are provided on three CDs. The installation can be run from the CD or from the hard drive by first copying the files to folders on the hard drive and then beginning the installation process. If the installation is performed from the CD, you will need approximately three gigabytes of free space on your hard drive to hold the completed installation. If the installation is performed from the hard drive, you will need approximately four gigabytes of free space to hold the installation software and the installed software. The installation in this example was performed from the hard drive.
STEP 1:
From My Computer, double-click the CD icon to start the Oracle Universal Installer that will be used to guide you through the installation process. A window will appear providing you with the options Install/Deinstall Products, Explore CD, and Browse Documentation. After clicking the Install/Deinstall option, the following welcome window will appear:
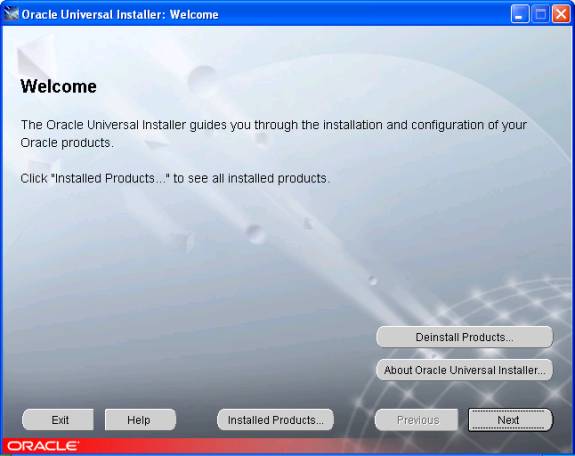
Click the Next button in the lower right portion of the window to begin the installation process.
NOTE: Your computer should not have any other Oracle products previously installed. If it does, you should deinstall the existing Oracle product. To do this, click the aforementioned Install/Deinstall Products button and follow the prompts for deinstallation. A window will appear, prompting you to select the software to be deinstalled. Select the appropriate software, and click the Next button to begin the deinstallation of the software. When this process is complete, proceed with installation.
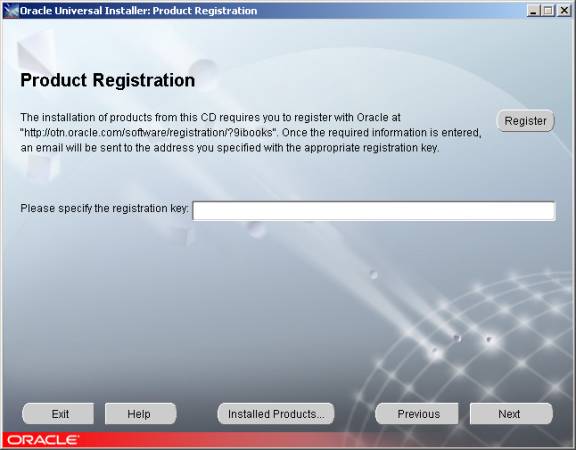
Before you are allowed to continue with the installation process, you will be prompted to enter a product registration key. If you did not register with the Oracle Technology Network (OTN) before beginning the installation process, you will need to click the Register button located in the upper right quadrant of the window. If you have already registered, enter the product registration code you received via e-mail into the text box and click the Next button in the lower right portion of the window to continue with the installation process.
STEP 2:
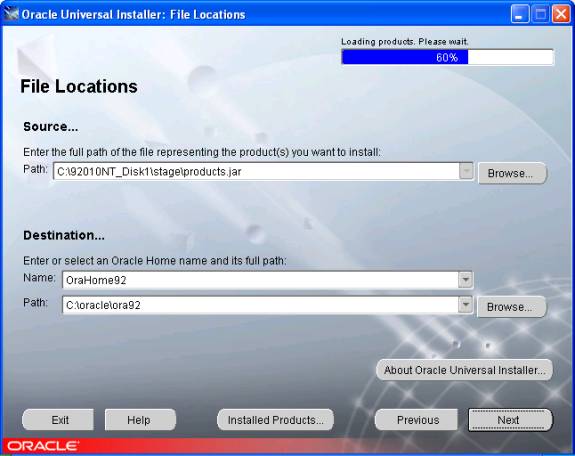
The text box displayed in the upper portion of the screen contains the name of the folder containing the contents of the first CD. There should be no need to change the contents of the text box. The two text boxes in the lower portion of the screen display the name that will be assigned to this Oracle9i installation and where the files will be located after the installation is complete. Unless a previous version of the Oracle Database has been installed on the computer, no change will be necessary. Click the Next button in the lower right portion of the window to continue.
STEP 3:
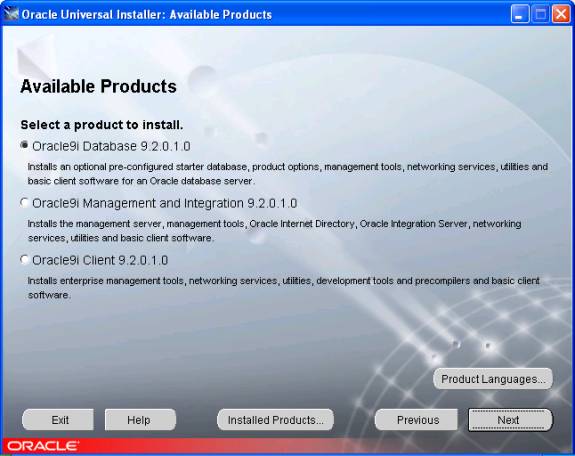
A window listing the products available for installation will appear. Verify that the option to install Oracle9i Database 9.2.0.1.0 is selected and click the Next button in the lower right portion of the window.
STEP 4:
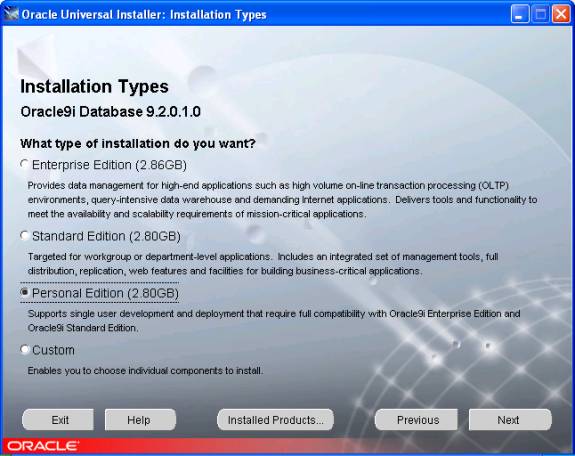
The Oracle Universal Installer will display a window allowing the user to select the desired edition of Oracle9i Database to be installed. The editions displayed will vary based upon the operating system detected by the Oracle Universal Installer. Verify that the Personal Edition is selected and click the Next button in the lower right portion of the window to continue the installation process.
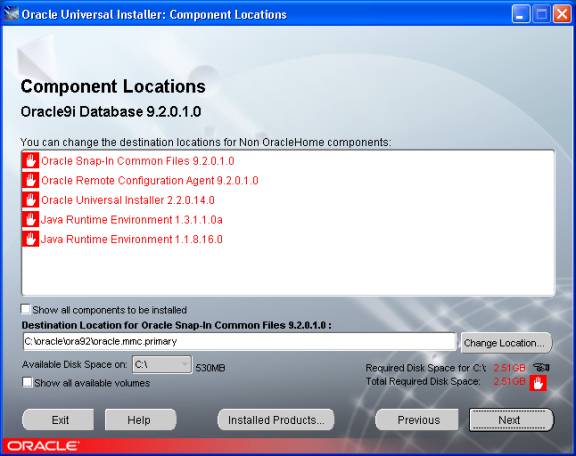
NOTE: If the following window appears, displaying locations for Oracle9i Configuration Tools, click the Next button in the lower right corner of the window. However, if this window does not appear on your screen, proceed to Step 5.
STEP 5:
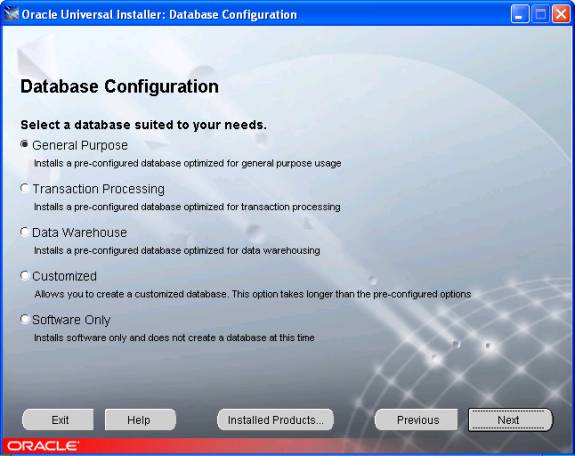
A window will be displayed based upon the type of installation selected. The window contains various types of database configuration that can be used based upon the purpose of the database (i.e., the type of data it will contain). Unless specified otherwise by the textbook, the General Purpose configuration should be selected. Click the Next button in the lower right portion of the window to continue.
NOTE: The final option in the list (Software Only) allows for the installation of the Oracle9i Database software without creating a database. If the Software Only option is selected, a database can be created after the installation process using the Database Configuration Assistant.
STEP 6:
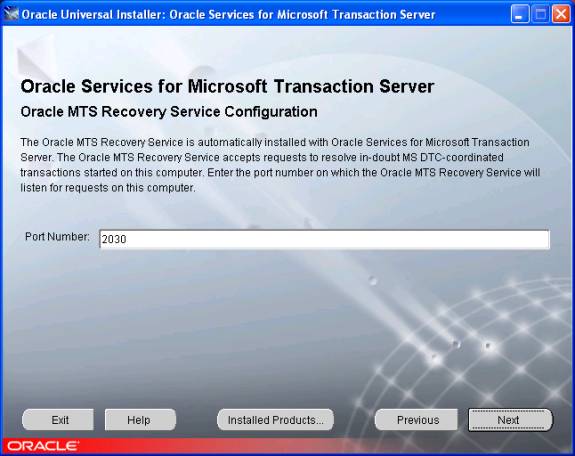
A window will appear requesting the port to be assigned to the listener for the Oracle MTS Recovery Service. This should not be changed unless the default port of 2030 is already assigned for another service. Once the port number has been verified, click the Next button in the lower right portion of the screen.
STEP 7:
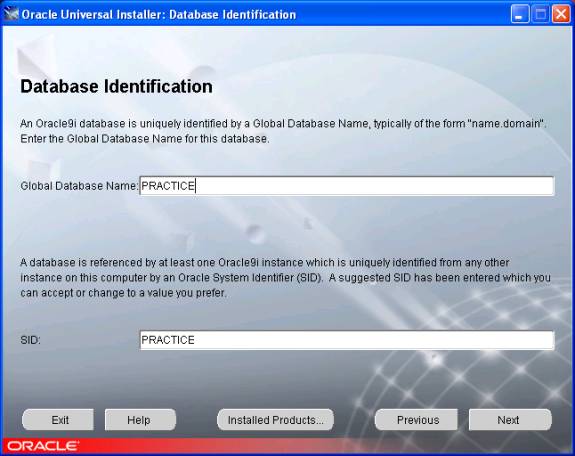
Unless the Software Only option was previously selected in Step 5, the Oracle Universal Installer will prompt for a name to be assigned to the database that will be created during the installation process. The name should be entered into the Global Database Name textbox in the upper portion of the window. The first eight characters of the Global Database Name will also be used as the SID for the database and will appear in the second textbox in the lower portion of the window. After the Global Database Name has been entered and verified, click the Next button in the lower right portion of the window.
STEP 8:
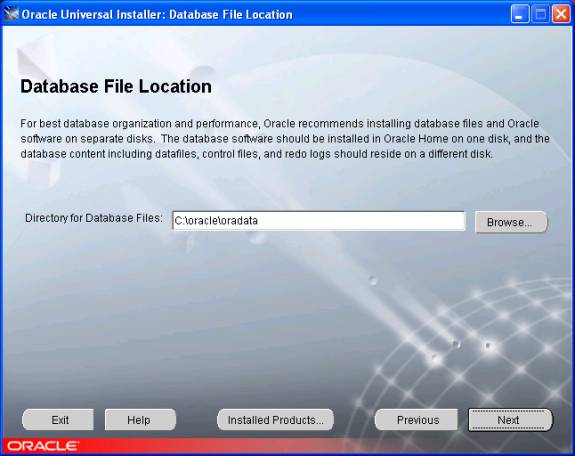
The Oracle Universal Installer will prompt for the location to store the files for the actual database to be created. A default location will be displayed in the textbox based upon the location of program files previously entered in Step 2. If the default location is acceptable, click the Next button in the lower right portion of the window to continue. Otherwise, enter a different location before continuing the installation process.
STEP 9:
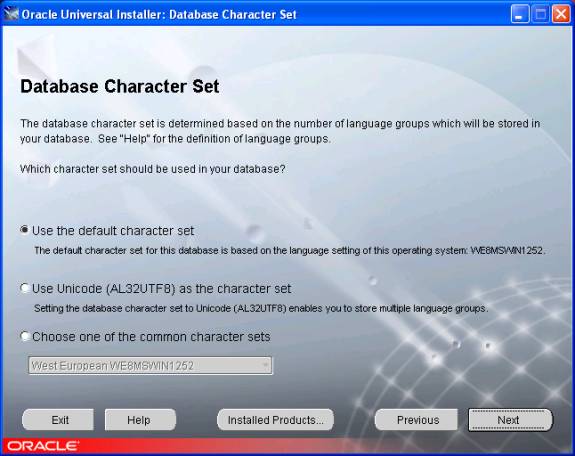
The Oracle Universal Installer next prompts for the correct character set to be used for the database. This option should only be changed if the database will contain data that requires multiple bytes to represent a character (i.e., Chinese, Arabic, etc.). Otherwise, the default character set should be selected. Click the Next button in the lower portion of the window to continue the installation process.
STEP 10:
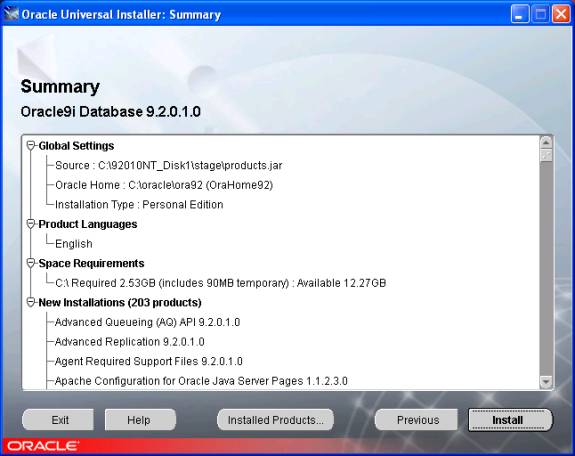
A summary of the products and settings will be displayed. Click the Install button in the lower right portion of the window to begin the actual installation of the Oracle9i Database software.
STEP 11:
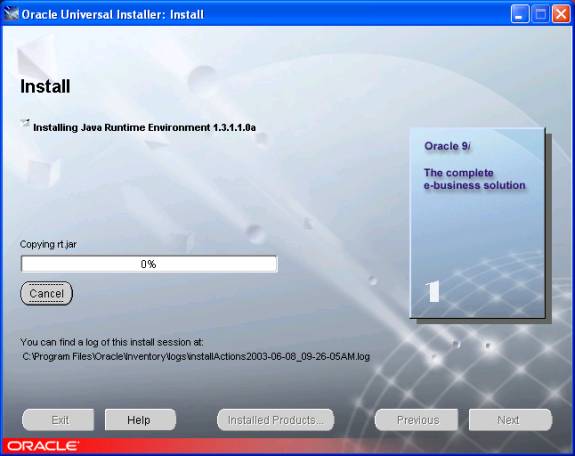
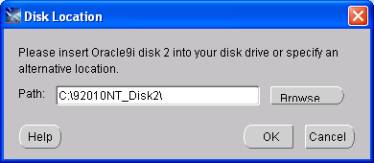
A window will appear that displays the status of the installation process. The installation of the Oracle9i Database software and creation of the database can take from 30 minutes to a couple of hours depending upon the processing speed of the computer. During the installation process, the Oracle Universal Installer will prompt for the correct location of the installation files. If the installation is being performed from the CD set, insert the correct CD, verify the path given in the dialog box, and click the OK button. If the installation files are stored on the hard drive, enter the correct location of the files and click the OK button in the dialog box.

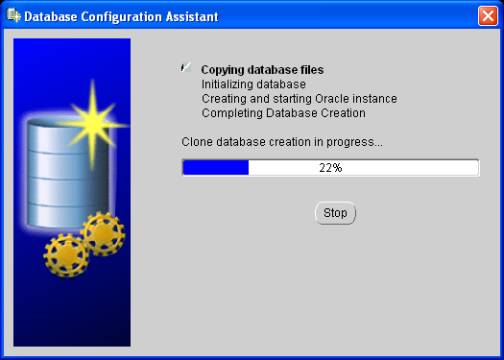
During the installation process, the Database Configuration Assistant will be activated to create the database named in Step 7. The checklist in the upper right portion of the window will display the stage of the database creation process.
STEP 12:
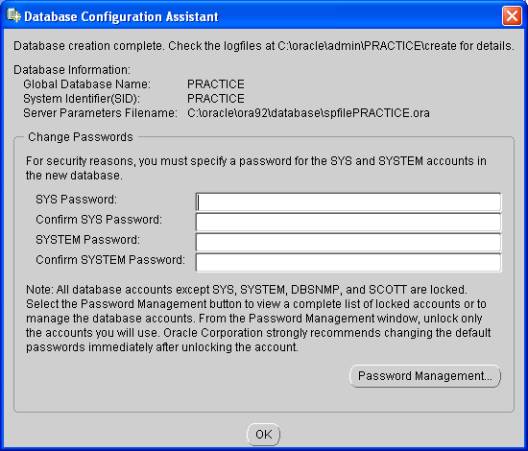
During the database creation process, the Database Configuration Assistant will prompt for the passwords to be assigned to the SYS and SYSTEM accounts. These are higher-level accounts with special privileges. With Oracle9i Release 2, these passwords can no longer be assigned to their respective accounts. After entering passwords for these accounts, make certain to record the passwords since access to these accounts may be needed later to assign privileges or to perform certain tasks. The default user account SCOTT with the default password of tiger can be used to perform basic tasks in the Oracle9i Database. Once the SYS and SYSTEM passwords have been entered in the respective textboxes, click the OK button at the bottom of the window.
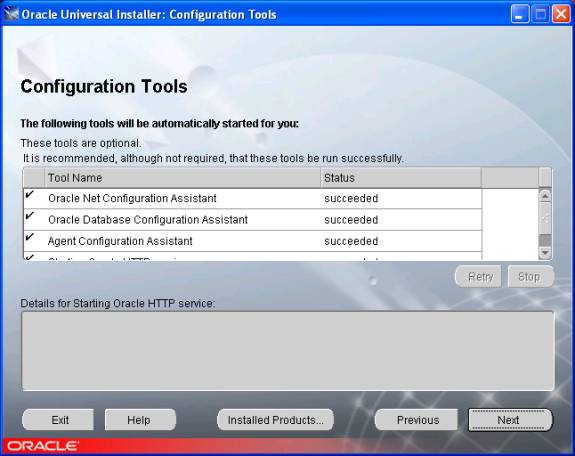
After clicking the OK button, a list of configuration tools being installed by the Oracle Universal Installer will be displayed.
STEP 13:
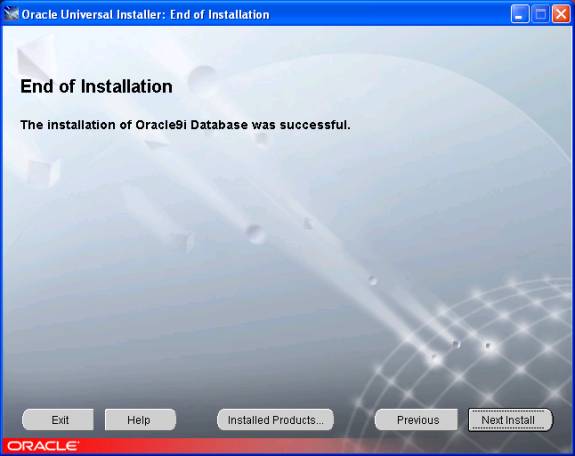
Upon completion of the installation and database creation processes, an End of Installation window will appear. At the top of the window, the Oracle Universal Installer will indicate whether or not the installation process was successful. To exit, click the Exit button in the lower left portion of the window. When the dialog box appears to confirm the Exit, click Yes.