Using Visual Basic Access (VBA):
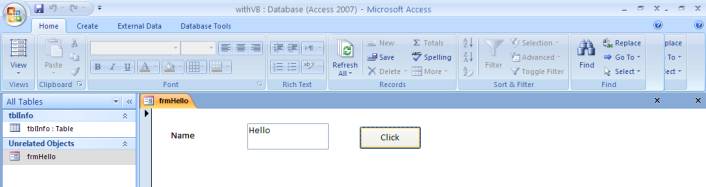
I started a simple database with a table and a few fields to show you the basic way that you can use VBA. For my first example, I set up a form with a text box (and the associated label) and a click button. The form has nothing to do with the table – it is just to test VBA. In later forms, I will use the table. Note that my text box is named txtName.
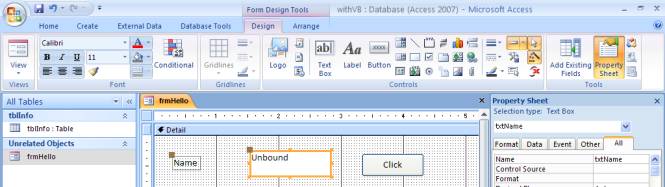
By button is named cmdClick with a caption of Click. The next step is to go
into the click event for the button and write my code. Nte that when you place
the button on the form, you may need to get out of the Command Button Wizard
depending on your settings.
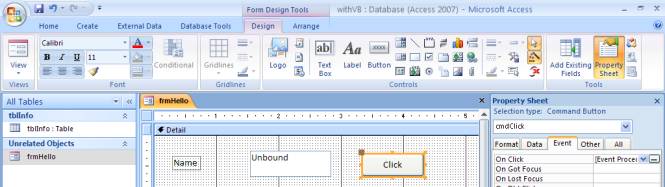
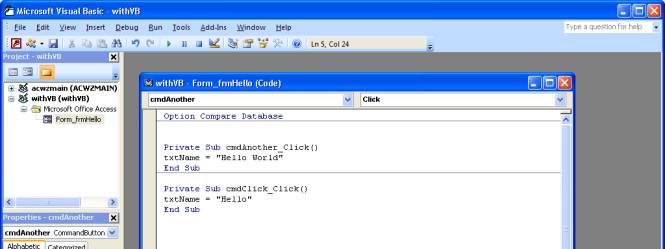
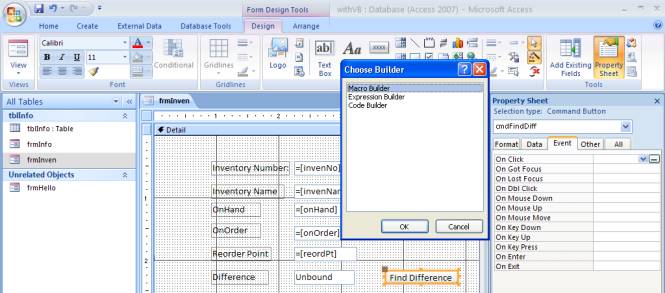
I click on the ... beside the Click Event.
I am given the choice of Macro Builder, Expression Builder and Code Builder.
I am going to select Code Builder and click OK. What comes up is an area that will allow me to build Visual Basic
for Access code.
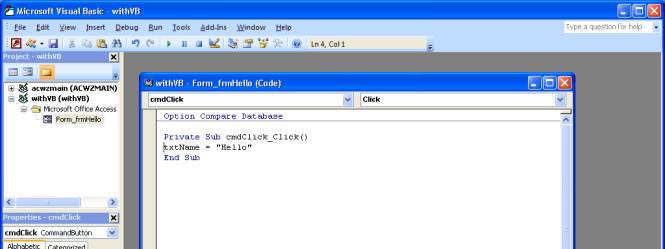
The only code that I wrote is the txtName = “Hello”. The information about the
sub that would be executed when I clicked was there when I entered the coding
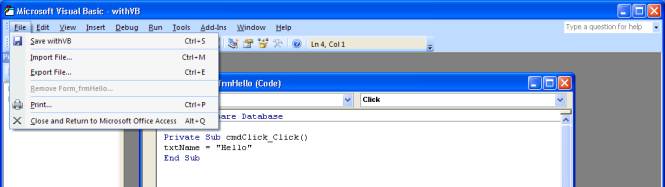
area after clicking the button. When I am done writing the code, I click on
file and get the option to close and return to Access.
After I return, I will test the code by running the form. To do this I open the
form.
Now I am going to add another button that will display Hello World. We will
then test the form again by clicking the second button.

For people who work with VB they will want to use the .text property after the
textbox field name. You cannot do this in VBA unless you first set the focus to
the field. See the example below.
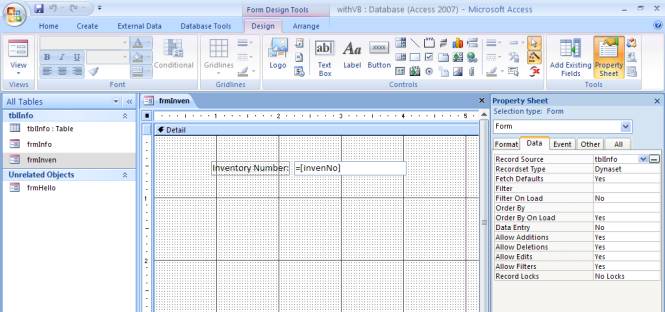
I am establishing that the record source for the form is tblInfo and then I
will establish the field associated with the textbox. I have tested and the
invenNo comes up, so now I will go in and add other fields. Note that I set the
format of the numeric fields to General Number.


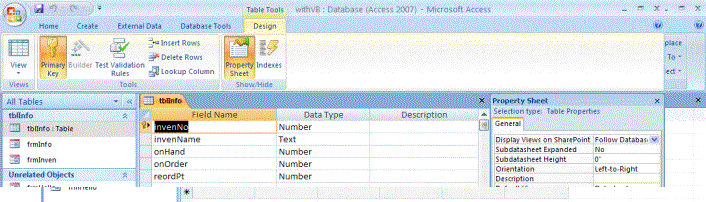
I should show you the table...
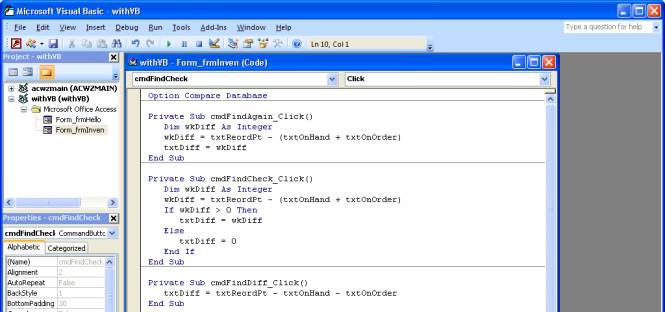
I am now adding a button to use to do a calculation.

I am now going to put enter code for the click event. I will choose
CodeBuilder.
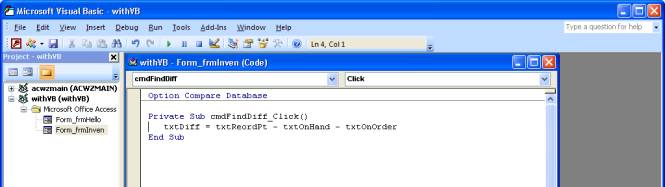
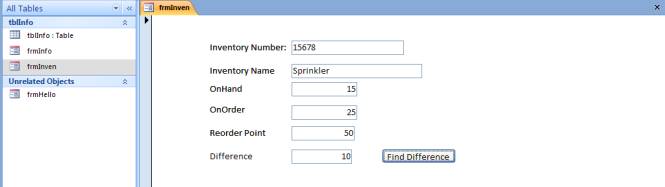
To calculate the difference, I subtracted both onHand and onOrder from the
reorderPt. The results of clicking the button vary depending on the record
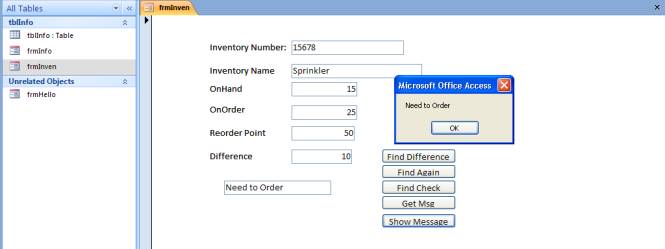
being processed. One is shown below.
Next I am going to add a few other buttons to do this in different ways.
In this example, I set up a memory variable work area called wkDiff with and defined it as an integer. If I needed a decimal number I would use single for a small decimal or double for a bigger decimal. Then I did the calculation and stored the result in the wkDiff field that I defined. Notice that the calculation first adds together onHand and onOrder and then subtracts the sum from reordPt.
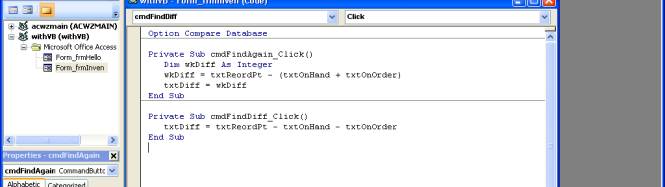
In this example, I am adding an if statement. If wkDiff is > 0 then I show
the results of the calculation.
If it is not, I take the else and show a 0.
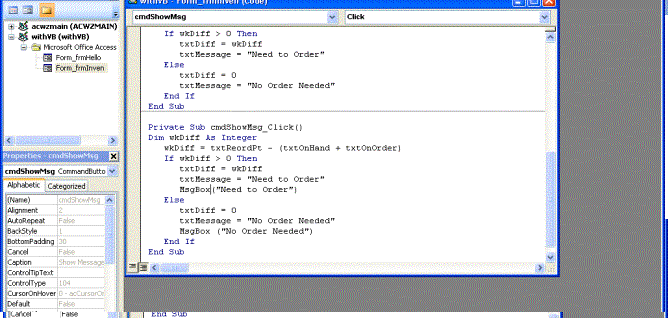
Now I am adding a pop up message box as shown below.
I have now created another table to experiment with. It has two fields, an id and an amount field.
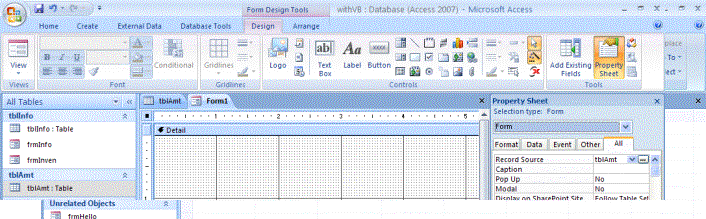
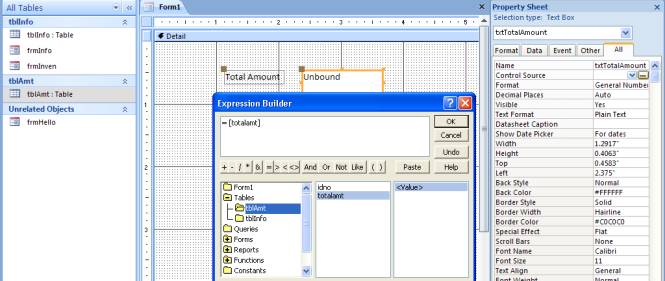
I am now creating a table with the form having a record source of tblAmt and
then I will set up a field with data source totalamt.
I am going to demonstrate a loop a few different ways and put the answer in a
text box. There is really no
significance except to show how loops work.
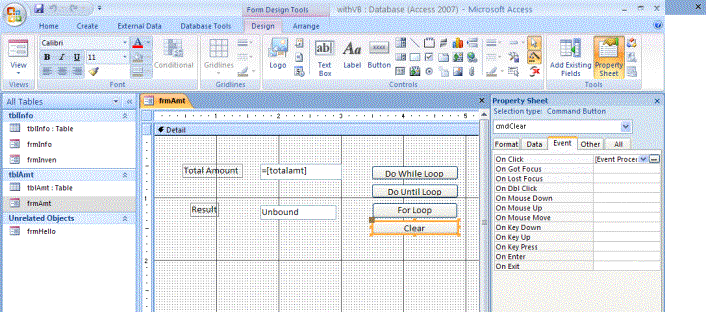
As you can see there are four buttons.
The first three illustrate different kinds of loops and the fourth
clears. The loops are Do While, Do
Until and For.
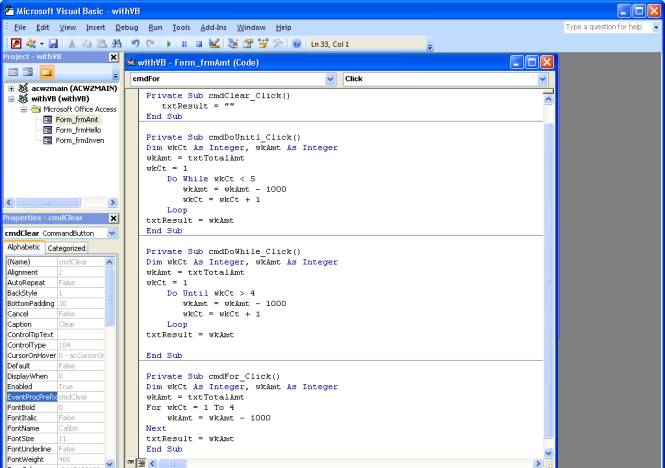
The Do While establishes two work areas – wkCt which will count the number of
times I do the loop and wkAmt which will hold the result of the
calculation. The Do While is going to
do the commands between the DoWhile and Loop while wkCt is less than 5. Notice that inside the loop, I add one to
wkCt. That is critical because you need
to change the condition that determines how long the loop goes on inside the
loop so that it will eventually end.
The DoUntil loop processes the same way except the condition is to do it
until wkCt is greater than 4.
The For loop automatically increments inside the loop, so I do not have to add to wkCt. I also did not have to establish a beginning point for wkCt because the For statement sets the beginning and the end within its statement.